Monday, March 12, 2012

Block of the Month 2011

I decided to spend a little bit of my Christmas money from 2010 in order to participate in the block of the month club at my local quilt store in 2011. For $20, I bought the pattern and the first block. As long as I came to one of the 'classes' (a.k.a. "we are going to try and sell you all of the new patterns and fabrics we got at the store in the last month") and had my block completed from the previous month, I received the next month's block free. I could choose between Civil War, Kansas Troubles, or batik fabrics.


I chose batik fabrics.

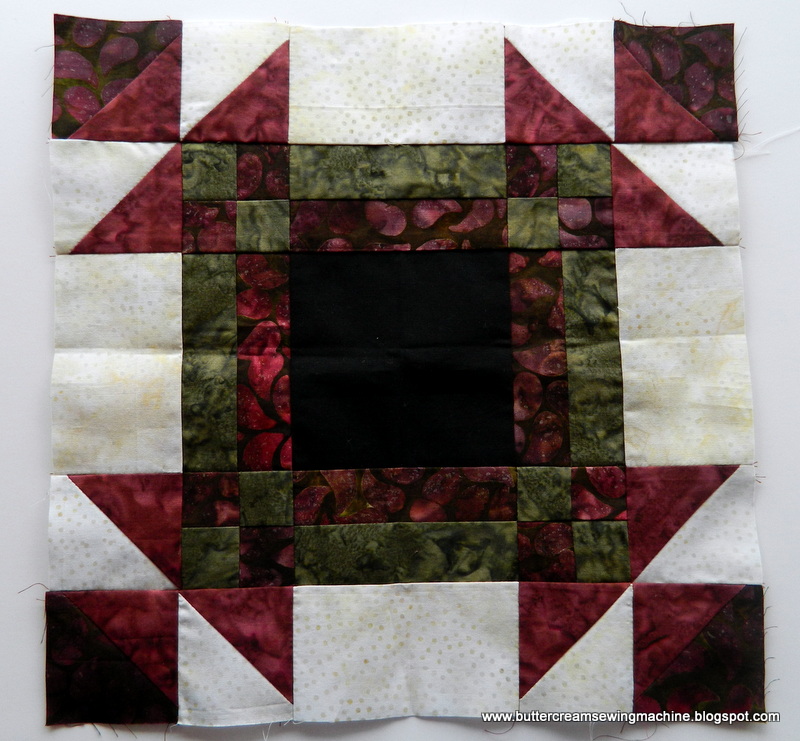
Each block involved different colors of batik fabrics, but the center of all of the blocks was a solid black square. I stretched myself and learned new techniques to make blocks I had never made before. I definitely learned a lot last year!

January

February

March

April

May

June

July

August

September

October

November

December

After I finished the last block, I worked on piecing together the quilt. I chose to use black and white for sashing and star points between the blocks. I was hoping to blend in the black centers of each block.


When quilted, it will be a lap-sized quilt for our living room.


I don't love all of the black, and I am sad that it looks like the sampler it is (although I don't know what I expected). I am planning on backing it in a minky fabric, so I know it will get lots of use.

I chose not to do the block of the month for 2012, because after paying the initial fee, for the finishing fabrics, and for the gas each month, I realized I could make a quilt that I really want to make. I have thought about building my stash of fabrics this year and making blocks from The Farmer's Wife. But, I haven't decided for sure yet.

Have you ever participated in a block of the month before? What did you think? Would you do it again?


Pin It

Friday, March 9, 2012

Friday Night Treat/Tutorial: Frosting Flowers

A couple of weeks ago I showed you a quick and easy way to decorate cupcakes, using a frosting swirl. Through that post, I also found out that I am not the only one who would pass on a piece of cake but loves a good cupcake!

Today I want to show you my favorite favorite favorite way to quickly frost a cupcake. It takes a little bit of practice, but once you get the technique you can frost a couple dozen of these in 30 minutes!

I used Wilton tip 104. You can buy frosting tips individually at places like Michael's or Hobby Lobby, or in sets at Wal-Mart. They usually cost $1-$2 for an individual tip. Not such a big investment when you compare that to how much it costs to buy a dozen cupcakes from the grocery store!

This tip is a thin, teardrop shape, with an opening wider at one end than the other. After filling your frosting bag about 2/3 full with frosting (here is my favorite frosting recipe), we are ready to get started.

1. Get your cupcake ready but placing it in an area where you can easily turn the cupcake.
2. Place your tip just above the center of your cupcake, with the widest side of the tear-drop closest to the cupcake.
3. Tip your frosting bag so the tip is at about a 45 degree angle (the top of your frosting tip will be at about 10 o'clock).
4. Squeeze the frosting out, making the left side of a single petal all the way to the edge of the cupcake.
*When you reach the edge of the cupcake, continue squeezing the frosting bag as you turn it so the top of the tip is at about 2 o'clock.
*Squeeze the frosting bag, coming back to the center of the cupcake. You now have one completed petal.
5. Start in the center again. Make the left side of your petal (touching the right side of the petal next to it), and coming back to the center making the right side of your petal.
6-7. Continue all the way around the cupcake (I usually have about 6 petals going around the first layer of the cupcake).
8. When the top of the cupcake is full of petals, continue the same technique to make a second layer of petals.
*Place your frosting bag in the center, with the widest part of the teardrop shape closest to the center of the cupcake.
*Make petals extending from the center of the cupcake towards the outer edge (but the second layer has shorter petals that don't quite go all the way to the edge). I try to have the petals on the second layer form above where two petals meet on the layer below.
9-10. Continue in the same manner as the first layer of petals (I usually make about 4 or 5 petals on the second layer).
11-12. Add sprinkles or leave plain!

Other notes:
I like to rotate the cupcake as I frost, so I always make the petals in the same direction. I make a petal, and rotate the cupcake, make a petal, and rotate the cupcake, and continue that way all the way around the cupcake.


This is my favorite technique to use when I need to frost a cupcake quickly. I think it looks elegant, but is so simple to complete.

I used this technique in order to frost 1/2 of the cupcakes for this baby shower (the pinks and yellows). I then sprinkled large granule sugar on top.

It's also fun to switch colors while using the same frosting bag. I had some pretty cool yellow flower cupcakes where the flower petals had pink tips! This happened because after the pink frosting ran out, I just put yellow into the frosting bag without cleaning it out.
You can see in the picture some of the blue and purple combinations I have too, just by putting the next color in the bag when the original color ran out. Just a fun thing to try sometime!

Pin It

Wednesday, March 7, 2012

Tutorial: Zippered Anything Pouch

If you haven't noticed, some of my favorite things to sew are clutches and purses. I love that you can use fun fabrics and make a useful item. I also love that you don't have to know someones size in order to give a personalized gift!


A friend of mine showed me a pouch similar to this one that she had bought for around $15 dollars. She said she would love to have more of the same pouch and wanted to sew them herself. I took some measurements of the pouch she had, and based the project off of that (I condensed the size just a little bit so I could use two fat quarters of fabric). The fun part is, you can use the general steps for this pouch and make it whatever size you want to! If you need something to hold a few toiletry items for traveling, measure the length of your toothbrush and make sure it will fit.

It is a perfect pouch for keeping toys together...

...for art supplies to keep little (or big) hands busy...

...or to keep your newest craft project all together and clean for mobility!

I hope you have as much fun making your zippered pouch as I did.

Supplies:


  • Two Fat Quarters (one for the outer fabric and one for the lining)

  • Two - 11" x 10.5" pieces of fusible fleece or batting
  • One - 10" zipper (use this tutorial to help you get the right length of zipper)
  • Basic sewing supplies (thread, sewing machine, scissors, etc.)

Directions:

#1 - Cut each fat quarter into two 11" x 10.5" rectangles.
*If you are using fusbile fleece, press it to the back of your outer fabric or your lining fabric now.

#2 - Layer your outer fabric and lining fabric right sides together. Center the zipper between these two layers along the top edge, facing the outer fabric (it should be about 1/4" from each edge). If using batting - place the batting on top of all of the layers. Sew across the top edge.

#3 - Layer your other piece of outer fabric and lining fabric with right sides together. Center the raw edge of the zipper between these two layers along the top edge, facing the other outer fabric (it should be about 1/4" from the left and right edge). If using batting - place the batting on top of all of the layers. Sew across the top edge (sewing through 4 layers - including the batting/fusbile fleece).

#4 - Lay your fabrics out so the zipper is in the center. On the left side of the zipper should be one piece of lining fabric, one piece of the batting, and one piece of the outer fabric. The same three layers should be on the right side of the zipper. Sew next to each side of the zipper.

#5 - Open your zipper about halfway. Lay your pouch so the outer fabric is facing right sides together on one side of the zipper, and your lining fabric is facing right sides together on the other side of the zipper. The batting can be placed either with the lining or with the outer fabric (I placed it with the lining). Sew around the pouch, leaving a 2"-3" opening along one side of the lining. Be careful not to sew the edges of your zipper as you sew around the pouch.

#6 - Optional: Make box corners. There are several ways to do this (so do what is comfortable for you). I lay my corner flat, so the seam is running down the middle. Line up your ruler so the center seam line and the edge of the fabric is at a 45 degree angle. I measured 2.5" across and drew a line.

#7 - Sew along this line, and cut off the corner about 1/4" from the seam line. Repeat with the other bottom corner on the outer fabric, as well as the two bottom corners on the lining fabric. This will give your pouch a flat bottom.

#8 - Turn the pouch right side out.

#9 - Sew the opening in the lining closed by handstitching or using a small seam allowance.

#10 - Enjoy your Zippered Anything Pouch!

What are you going to put inside?

Other fun clutches and purses you can sew:
Fabric Strip Clutch
Red Wool Purse


Pin It